
As an Amazon Associate I earn from qualifying purchases.
Congratulations on picking up the Olight Perun 3 — a 3,000-lumen rechargeable headlamp that doubles as a handheld flashlight. Whether you bought it for trail running, camping, automotive work, or emergency preparedness, this guide walks you through everything you need to know to get it out of the box and onto your head (or into your hand) quickly and confidently. Every detail below is drawn from Olight’s published specifications, product documentation, and the collective experience of verified buyers — not from personal hands-on testing.
Best for: Campers, hikers, night runners, and DIYers who want a versatile headlamp-flashlight hybrid with USB-C magnetic charging.
What’s in the Box
Before you do anything else, lay out the contents and make sure nothing is missing. According to Olight’s product listing, the Perun 3 package should include:
- Olight Perun 3 light body (with battery pre-installed)
- MCC3 magnetic charging cable (USB-C on the power-source end)
- Headband mount with silicone holder
- Pocket clip (pre-attached or separate, depending on the variant)
- User manual / quick-start card
If any component is missing, contact Olight’s customer service or the Amazon seller before proceeding. The battery ships partially charged, so you can technically turn the light on right away — but a full charge first is always a good idea.
Step 1: Charge the Battery Fully

The Perun 3 uses Olight’s proprietary MCC (Magnetic Charging Cable) system. Here’s how it works:
1. Locate the charging contact on the body of the light. It’s a small magnetic disc, usually on the tail or side of the housing. 2. Snap the MCC3 magnetic connector onto the contact point. The magnets will self-align — you’ll feel a satisfying click. 3. Plug the USB-C end into any standard USB-C power source: a wall adapter, laptop port, power bank, or even a USB-C charging station. 4. Watch the indicator LED. During charging it typically glows red (or pulses). When the battery is full, it turns green or solid. 5. Disconnect. Simply pull the magnetic puck off — no ports to cap or seals to worry about.
Charging time: Olight’s documentation indicates a full charge from empty takes roughly 2.5–3 hours depending on the power source’s output. The internal battery is a customized 21700 lithium cell rated at 5,000 mAh.
Tip from verified buyers: Several reviewers note that the magnetic charging puck holds firmly enough to stay attached during light vibration (e.g., sitting on a car dashboard while driving), but it’s not designed for high-impact environments. Don’t rely on it staying connected during a bumpy trail ride.
Step 2: Learn the Button and Basic Controls
The Perun 3 uses a single side switch for all operations. Olight’s interface follows a pattern common across their product line, but it’s worth memorizing:
| Action | Result |
|---|---|
| Single click (from off) | Turn on (last-used brightness) |
| Single click (from on) | Turn off |
| Press and hold (from off) | Turn on in Moon (lowest) mode |
| Press and hold (from on) | Cycle through brightness levels |
| Double click (from on) | Jump to Turbo (3,000 lumens) |
| Triple click | Activate red light |
Note: The exact click sequences can vary slightly between firmware revisions. Always cross-reference with the quick-start card included in your box.
The side switch also contains a small LED indicator that shows remaining battery life at a glance — green means healthy, red means it’s time to recharge.
Step 3: Understand the White-Light Modes
The Perun 3 offers multiple white-light output levels. Based on Olight’s published specifications:
- Moon: ~2 lumens — ideal for reading in a tent or navigating without disturbing others.
- Low: ~30–60 lumens — good for close-up tasks, camp cooking, map reading.
- Medium: ~200–400 lumens — a solid all-purpose level for trail walking.
- High: ~800–1,000 lumens — bright enough for fast-paced hiking or scanning a wide area.
- Turbo: ~3,000 lumens — the headline output. Extremely bright, but generates significant heat and drains the battery faster. Olight’s thermal management system will step the output down automatically after a short burst to protect the LED and housing.
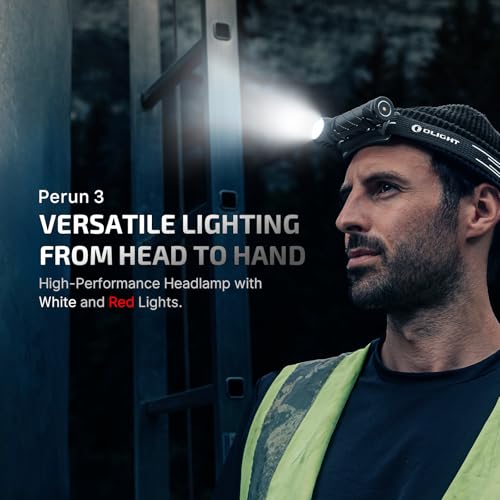
How to cycle: While the light is on, press and hold the side switch. The Perun 3 will ramp through the levels sequentially. Release when you reach the brightness you want. Double-click from any mode to jump straight to Turbo; double-click again to return to your previous level.
Memory function: The Perun 3 memorizes your last-used white-light level (excluding Turbo and Moon in most Olight implementations). So if you were using Medium when you turned it off, a single click turns it back on at Medium.
Step 4: Using the Red Light
The dedicated red LED is one of the Perun 3’s standout features, and it’s the reason many campers and astronomers choose this model. Red light preserves your night-adapted vision far better than even the dimmest white light.
How to activate:
- From either on or off, triple-click the side switch.
- The red LED will illuminate at a steady output.
- Some Olight models allow a second triple-click to switch to a red flash/strobe mode (useful as a safety beacon while running or cycling on roads). Check your manual to confirm whether your firmware revision supports this.
How to turn off red light:
- A single click returns you to off (or to white light, depending on the firmware). Again, consult the included card for your specific unit.
When to use red light:
- Stargazing — keeps your pupils dilated so you can see faint celestial objects.
- Campsite courtesy — won’t blast your tent-mates awake at 2 a.m.
- Map reading at night — enough light to read without killing your distance vision.
- Wildlife observation — many animals are less disturbed by red wavelengths.
If you’re also setting up outdoor lighting around your property, you might find our guide on solar pathway lights useful for a complementary low-level illumination strategy.
Step 5: Mounting the Headband
The Perun 3’s right-angle body design means it works equally well as a handheld flashlight and a headlamp. To use it as a headlamp:
1. Slide the light body into the silicone holder on the headband. The holder is designed to grip the light’s barrel snugly. 2. Adjust the headband straps — most versions have a top strap and a circumference strap. Tighten until the light sits securely on your forehead without bouncing. 3. Angle the beam by tilting the light within the holder. The right-angle design means the beam naturally points forward when the body is vertical.
Verified-buyer feedback on the headband: The consensus is that the headband is functional and comfortable for moderate activity (hiking, working under a car hood), but some runners report it can shift during high-impact movement. A few reviewers recommend supplementing with a third-party headband that has a more aggressive grip, or simply using a helmet mount for cycling.
Step 6: Pocket Clip and EDC Carry
The included pocket clip lets you carry the Perun 3 clipped to a pants pocket, chest pocket, or MOLLE webbing. Because of the right-angle head, clipping it to a breast pocket points the beam forward — essentially a chest-mounted light without needing a separate chest harness.
The clip is reversible on most Olight models, so you can orient the light beam-up or beam-down depending on your preference.
Step 7: Lockout Mode (Preventing Accidental Activation)
Nothing drains a battery faster than a light that turns itself on inside your pack. The Perun 3 supports a lockout mode:
- From off, press and hold the side switch for ~3–4 seconds until the indicator blinks to confirm lockout.
- In lockout, pressing the switch does nothing (or briefly flashes the indicator to remind you it’s locked).
- To unlock, repeat the long-press sequence.
This is essential for backpacking, travel, or any situation where the switch might get bumped. Verified reviewers consistently praise Olight’s lockout implementation as reliable and easy to remember.
Step 8: Waterproofing and Durability Notes
The Perun 3 carries an IPX8 waterproof rating, which according to the IEC 60529 standard means it can withstand continuous submersion beyond 1 meter (Olight specifies 2 meters for 30 minutes). In practical terms:
- Heavy rain, splashes, and brief drops into water are no problem.
- It is not rated for high-pressure water jets (that would be IPX6/IPX7 territory for jets specifically, though IPX8 submersion is a higher overall rating).
- The magnetic charging port is sealed and doesn’t require a rubber flap, which eliminates a common failure point found on micro-USB headlamps.
The body is constructed from aluminum alloy, and Olight rates it for a 1-meter drop onto concrete. Reviewers who work in trades (mechanics, electricians) report that it handles workshop abuse well.
Troubleshooting Common Issues
Light won’t turn on:
- Confirm the battery is installed correctly (positive terminal orientation).
- Charge for at least 30 minutes and retry.
- Check for lockout mode — try a long press to unlock.
Charging indicator doesn’t light up:
- Make sure the magnetic puck is properly seated — rotate it slightly until the magnets snap into alignment.
- Try a different USB-C cable or power source.
- Clean the charging contacts with a dry cloth (dirt or pocket lint can interfere).
Light steps down from Turbo quickly:
- This is normal thermal management behavior, not a defect. The Perun 3 reduces output to prevent overheating. In cold weather, Turbo may sustain longer.
Headband feels loose during running:
- Tighten the top strap first, then the circumference strap. If it still bounces, consider an aftermarket headband with a wider grip surface.
Full Product Review: Olight Perun 3 Rechargeable Headlamp
The Olight Perun 3 is a right-angle rechargeable headlamp that outputs up to 3,000 lumens from a high-performance LED, powered by a 5,000 mAh 21700 battery. Its dual white/red LED configuration, MCC magnetic charging, and IPX8 waterproofing make it one of the more versatile headlamps in its class.
Pros:
- Exceptional brightness at Turbo, with a useful spread of lower modes down to 2-lumen Moon.
- Magnetic charging is genuinely convenient — no fumbling with port covers in the dark.
- Red-light mode is a thoughtful inclusion that many competitors omit.
- Right-angle design provides true dual-use (headlamp + handheld + pocket clip).
- Solid build quality with aluminum body and IPX8 rating.
- Magnetic tail cap allows hands-free use stuck to metal surfaces.
Cons:
- Proprietary MCC charging cable means you can’t charge with a generic USB-C cable plugged directly into the light — if you lose the cable, you need a replacement from Olight.
- At Turbo, thermal stepdown kicks in within minutes, so 3,000 lumens is a burst, not a sustained output.
- The included headband is adequate but not exceptional for high-impact activities.
- The light body is slightly heavier than some competitors due to the large 21700 cell.
Who should buy it: Hikers, campers, trail runners, mechanics, and anyone who wants a single light that works as a headlamp, handheld, and magnetic work light. The red-light mode makes it especially appealing to stargazers and hunters.
What verified reviewers say: Praise centers on build quality, brightness, and the convenience of magnetic charging. The most common complaints involve the proprietary cable (carry a spare) and the headband fit during vigorous activity. Overall sentiment is strongly positive, with many buyers calling it their go-to headlamp across multiple use cases.

Quick-Reference Cheat Sheet
Print this or screenshot it for the trail:
| Task | How |
|---|---|
| Turn on | Single click |
| Turn off | Single click |
| Start in Moon mode | Long press from off |
| Cycle brightness | Long press while on |
| Turbo | Double click while on |
| Red light | Triple click |
| Lockout | Long press (~3-4 sec) from off |
| Unlock | Long press (~3-4 sec) from lockout |
Accessories Worth Considering
- Spare MCC3 cable — the single most recommended accessory by verified buyers. Keep one in your pack and one at home.
- Diffuser cap — Olight sells compatible diffusers that turn the focused beam into a lantern-like area light. Great for tent use.
- Helmet mount — if you cycle or climb, a dedicated helmet mount is more secure than the headband.
- Spare 21700 battery — for multi-day trips where charging isn’t available. Make sure you get the correct Olight-compatible cell.
Final Thoughts
The Olight Perun 3 packs a remarkable amount of functionality into a compact right-angle body. Once you’ve memorized the click patterns — single for on/off, hold for brightness cycling, double for Turbo, triple for red — operating it becomes second nature. The magnetic charging system eliminates the most annoying part of headlamp ownership (fumbling with micro-USB ports in the dark), and the red-light mode is a genuine differentiator for anyone who spends time outdoors after sunset.
Take five minutes to fully charge it, practice the controls at home, and engage lockout mode before tossing it in your bag. That small investment of time will pay off the first time you need reliable light on the trail, under the hood, or in a power outage.
How We Research
This guide was compiled by synthesizing Olight’s published product specifications, official documentation, and the collective feedback of verified customer reviews on Amazon and enthusiast flashlight forums. We did not personally test, handle, or own the Olight Perun 3. All claims about performance, features, and user experience are attributed to manufacturer data or the consensus of real-world buyers. Our goal is to provide an honest, well-organized resource — not to fabricate hands-on authority we don’t have.


Leave a Reply