As an Amazon Associate I earn from qualifying purchases.
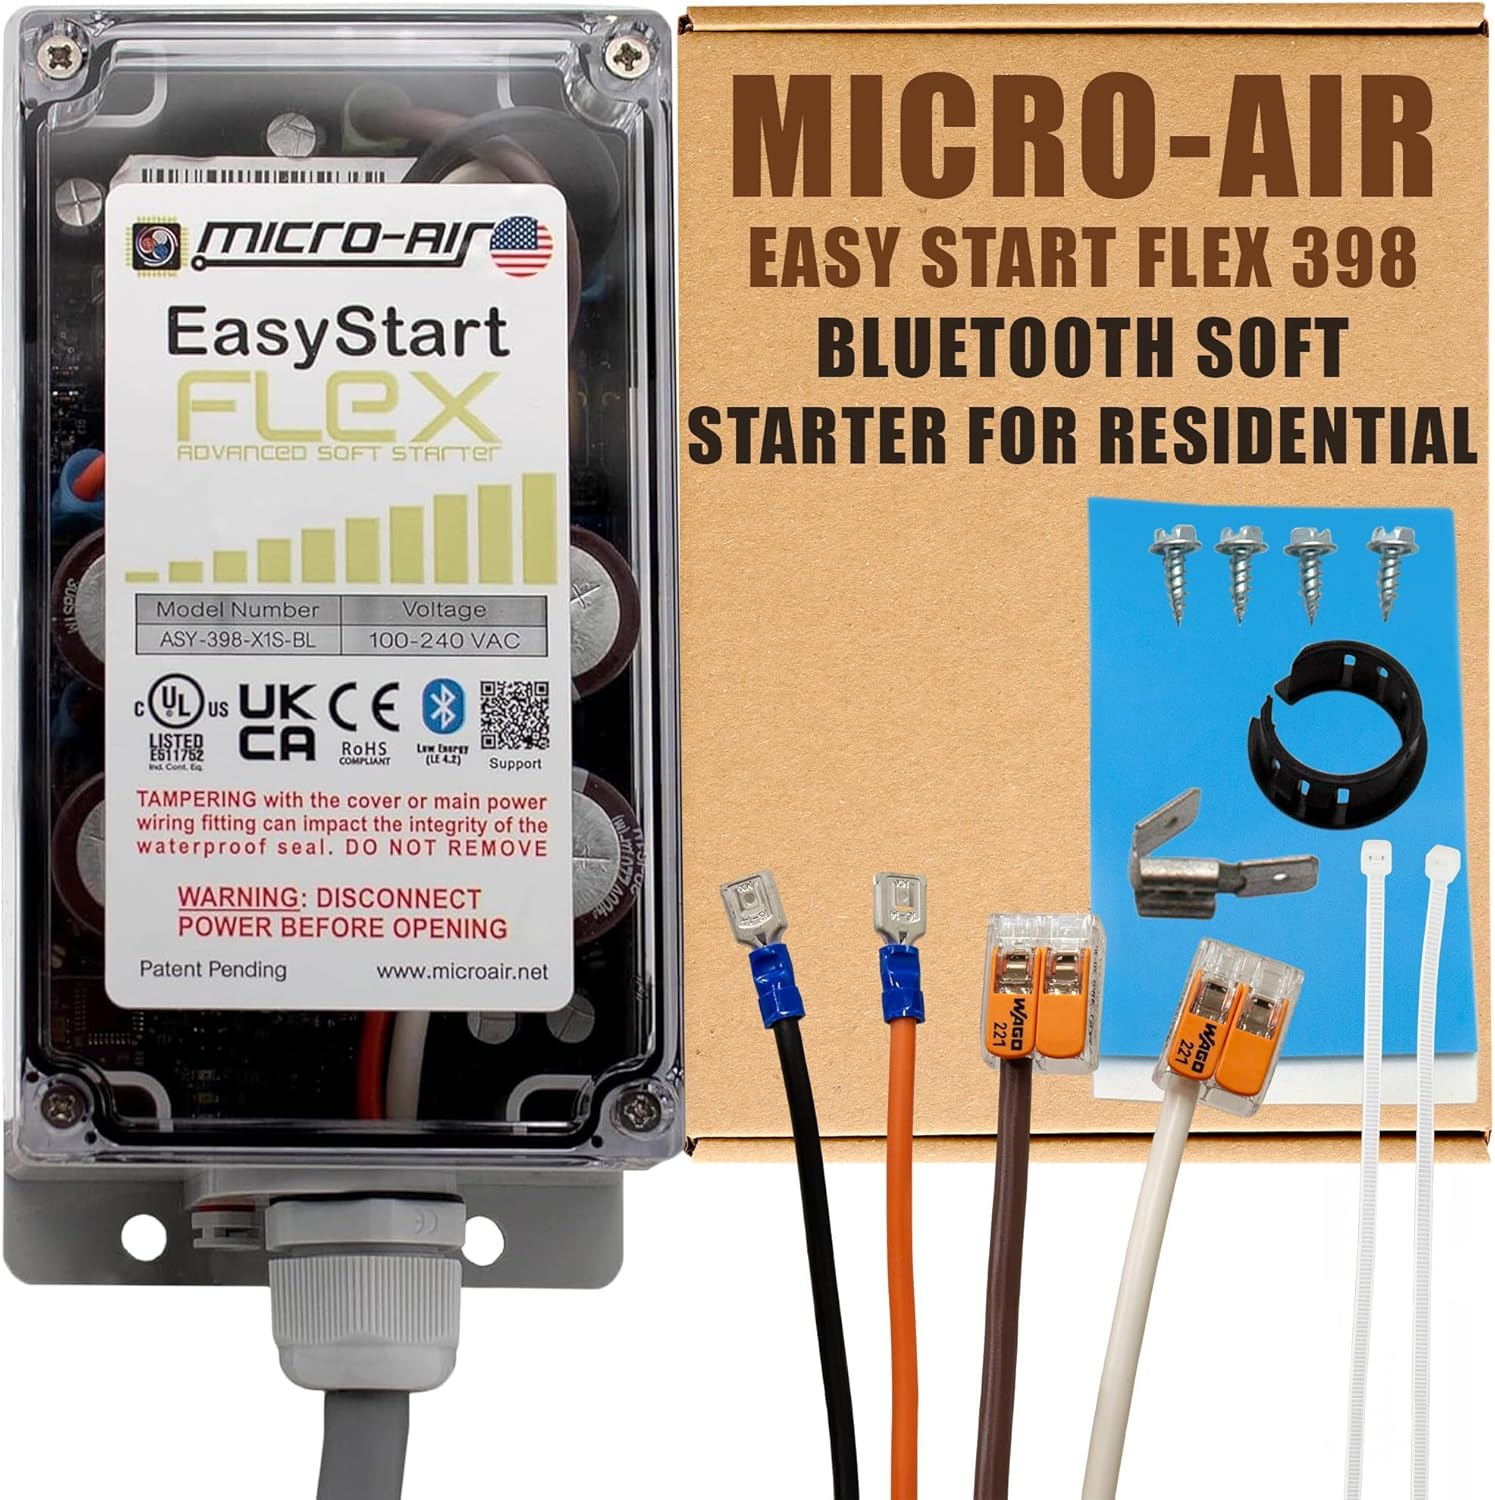
Your RV air conditioner’s soft start kit is one of those “install it and forget it” components — until the day it stops working and your compressor draws a massive inrush current that trips the breaker at the worst possible moment. A Bluetooth-enabled soft start kit like the MICRO-AIR EasyStart FLEX 398 is a sophisticated piece of electronics that manages compressor startup current, and like any electronic device exposed to heat, vibration, and weather, it benefits enormously from periodic maintenance. This guide walks you through a practical, step-oriented maintenance routine drawn from manufacturer documentation, verified installer feedback, and real-world owner reports so you can keep your soft start kit performing reliably for years.
Best for: RV owners, off-grid campers, and anyone running an AC on limited power
Why Soft Start Kit Maintenance Matters
A soft start kit sits between your power supply and your air conditioner’s compressor. It reduces the startup surge — often from 40–70 amps down to 15–25 amps — so you can run your AC on a smaller generator, a 30-amp shore power hookup, or even an inverter. Because the kit handles high-current switching dozens or hundreds of times per season, its internal components (relays, capacitors, circuit boards) endure real electrical and thermal stress.
Neglecting maintenance can lead to:
- Degraded startup performance — the kit may no longer reduce inrush current as effectively.
- Overheating — dust and debris insulate the unit, trapping heat.
- Corrosion — moisture intrusion at wire terminals causes resistance and arcing.
- Firmware bugs — Bluetooth-enabled kits receive periodic updates that fix known issues.
- Premature failure — a kit that should last 10+ years might fail in 3–5.
The good news: maintenance is straightforward, requires no specialized tools, and takes about 30 minutes twice a year.
Recommended Maintenance Schedule
| Interval | Task |
|---|---|
| Every 3 months (or before each trip) | Visual inspection, Bluetooth status check |
| Every 6 months | Full cleaning, terminal inspection, firmware check |
| Annually | Comprehensive inspection including wiring torque check |
| As needed | Firmware updates, diagnostic log review |
Step 1: Safety First — Power Down Completely
Before touching any component inside your RV’s rooftop AC shroud or electrical compartment:
1. Disconnect shore power or turn off the generator. 2. Switch off the AC breaker at your RV’s distribution panel. 3. Wait at least 5 minutes for capacitors to discharge. Manufacturer documentation for the EasyStart series emphasizes that residual charge can persist in the start capacitor even after power is removed. 4. Verify zero voltage with a multimeter or non-contact voltage tester at the unit’s input terminals.
Never assume the circuit is dead — verify it.
Step 2: Access the Soft Start Unit
Most RV soft start kits are installed inside the rooftop AC unit’s electrical compartment, which is accessed by removing the AC shroud on the roof. Some installers mount the kit inside the RV near the distribution panel. Consult your installation notes or the installer’s documentation to locate yours.
For rooftop-mounted units:
- Remove the AC shroud screws (typically 6–10 Phillips-head screws).
- Carefully lift the shroud — it may be brittle if sun-aged.
- The soft start module is usually zip-tied or bracket-mounted near the compressor’s electrical junction box.
Step 3: Visual Inspection
With the unit exposed, perform a thorough visual check:
- Enclosure integrity — Look for cracks, warping, or discoloration on the soft start module’s housing. The MICRO-AIR EasyStart FLEX 398 uses a potted (resin-sealed) enclosure designed for weather resistance, but physical damage can still compromise the seal.
- Wire connections — Check every spade connector, ring terminal, and wire nut for signs of corrosion (green or white buildup), heat discoloration (brown or black marks), or looseness.
- Mounting security — Ensure zip ties or mounting brackets haven’t loosened from road vibration. A dangling module can stress wire connections.
- Pest damage — Rodents and insects love rooftop AC compartments. Look for chewed wires, nests, or droppings.
If you spot corrosion on terminals, clean them with electrical contact cleaner and a small wire brush. Replace any damaged spade connectors with properly crimped and heat-shrink-sealed replacements.
Step 4: Clean the Unit and Surrounding Area

Dust, leaves, and debris accumulate inside the AC shroud and can blanket the soft start module, trapping heat:
1. Blow out debris with compressed air (a small portable compressor or canned air works). Direct the air across the module’s surface and around all wire connections. 2. Wipe the enclosure with a dry microfiber cloth. Avoid solvents on the potted housing unless the manufacturer specifically approves them. 3. Clean the AC’s electrical compartment while you’re there — dust on the compressor’s run capacitor and contactor can cause those components to overheat too, which indirectly stresses the soft start kit. 4. Check drainage paths — water pooling near the electrical compartment accelerates corrosion. Make sure the AC unit’s drain channels are clear.
This cleaning step is especially important if you camp in dusty environments (desert boondocking, gravel lots) or humid coastal areas where salt air accelerates corrosion. For related tips on maintaining HVAC accessories and keeping drain lines clear, see this AC drain line cleaner adapter review.
Step 5: Inspect and Tighten Wiring Connections
Vibration is the silent enemy of RV electrical connections. Over thousands of miles of road travel, even properly crimped terminals can work loose.
- Tug-test every connection — gently pull on each wire where it meets a terminal. It should not move.
- Re-torque screw terminals — if your installation uses screw-type terminal blocks, tighten to the manufacturer’s specified torque (typically 10–15 in-lbs for small terminals). Over-tightening can crack terminal blocks.
- Inspect wire insulation — look for chafing where wires pass through grommets or contact sharp edges. Apply split loom tubing or electrical tape to any worn spots.
- Check the ground connection — a poor ground is one of the most common causes of erratic soft start behavior, according to MICRO-AIR’s troubleshooting documentation.
Step 6: Bluetooth Diagnostics and Firmware Updates
One of the major advantages of a Bluetooth-enabled soft start kit like the EasyStart FLEX 398 is the ability to monitor performance and update firmware from your phone.
Connecting via Bluetooth
1. Power on the AC system (breaker on, but AC thermostat off). 2. Open the MICRO-AIR companion app (available for iOS and Android). 3. The app should discover the module within a few seconds if you’re within Bluetooth range (typically 30 feet or less). 4. If the module doesn’t appear, power-cycle the AC breaker and retry.
What to Check in the App
- Startup logs — Review recent compressor start events. The app displays inrush current readings and start duration. Consistently rising inrush numbers may indicate the kit’s internal components are degrading or that the compressor itself is wearing.
- Error codes — The app logs fault events such as locked-rotor detection, short-cycle protection activations, and over-temperature warnings. Address any recurring errors.
- Firmware version — Compare your installed firmware to the latest version listed on MICRO-AIR’s website or in the app’s update section. Firmware updates can improve start algorithms, fix Bluetooth connectivity bugs, and add compatibility for new compressor types.
Updating Firmware
Follow the app’s on-screen prompts. Key tips from manufacturer documentation:
- Ensure your phone has at least 50% battery.
- Stay within close Bluetooth range (under 10 feet) during the update.
- Do not interrupt power to the AC during the update process.
- After updating, power-cycle the AC breaker to let the module reinitialize.
If you’re interested in how other smart accessories use app-based monitoring and updates, the Smart Oil Gauge Duo compatibility guide covers a similar concept for fuel tank monitoring.
Step 7: Test the System
After completing your maintenance routine, verify everything works:
1. Restore power (shore power or generator). 2. Turn on the AC at the thermostat. 3. Listen for a smooth compressor start — no hard clunk, no lights dimming excessively. 4. Check the app for the startup current reading. It should be within the kit’s normal range (typically under 25 amps for a 13,500–15,000 BTU RV unit). 5. Let the AC run for 10–15 minutes, then cycle it off and back on to confirm the short-cycle protection and restart behavior are normal.
Seasonal and Long-Term Storage Tips
If you winterize your RV or store it for extended periods:
- Leave the soft start kit installed — removing and reinstalling creates unnecessary wear on connectors.
- Disconnect the RV’s main battery to prevent parasitic draw, but note that the soft start kit itself draws no power when the AC breaker is off.
- Cover the rooftop AC unit with a breathable cover to reduce dust and moisture intrusion.
- Run the AC for 10–15 minutes before storage to burn off moisture inside the compressor and electrical compartment.
- When de-winterizing, perform the full inspection routine above before the first use of the season.
Common Mistakes to Avoid
- Pressure washing the AC unit — high-pressure water can force moisture past seals and into the soft start module’s wiring compartment.
- Ignoring error codes — the Bluetooth diagnostics exist for a reason. A single locked-rotor event might be a fluke; repeated events signal a real problem.
- Using dielectric grease excessively — a thin coat on terminals prevents corrosion, but globs of grease can attract dust and actually insulate the connection.
- Skipping the ground check — installers and verified reviewers consistently cite poor grounding as the number-one cause of post-installation issues with soft start kits.
MICRO-AIR EasyStart FLEX 398: Detailed Review

The MICRO-AIR EasyStart FLEX 398 is the latest generation in MICRO-AIR’s well-regarded EasyStart line, and it’s the unit this entire maintenance guide is built around. It’s designed for RV, residential, and light commercial air conditioners with compressors up to 72,000 BTU (6 tons), making it one of the most versatile soft start kits on the market.
The standout feature is Bluetooth connectivity via the companion app, which provides real-time startup diagnostics, error logging, and over-the-air firmware updates. The unit uses self-learning start algorithms — it automatically calibrates to your specific compressor over the first several start cycles, optimizing the current ramp profile without manual adjustment. According to MICRO-AIR’s documentation, this reduces inrush current by up to 65–75%.
Verified reviewers commonly praise the dramatic reduction in startup surge, with many reporting they can now run their RV AC on a 2,000-watt inverter generator or a single 30-amp circuit alongside other appliances. The Bluetooth diagnostics receive positive marks for making troubleshooting accessible to non-electricians. On the downside, some reviewers note that the Bluetooth connection can be finicky on initial pairing, and the app interface, while functional, could be more polished. A few installers mention that the wiring instructions, while thorough, assume a level of electrical comfort that complete beginners may not have.
Pros:
- Broad compressor compatibility (single-phase, up to 6 tons)
- Bluetooth diagnostics and firmware updates
- Self-learning start algorithm — no manual tuning
- Potted enclosure for weather resistance
- Works for RV, home, and commercial applications
Cons:
- Bluetooth pairing can require multiple attempts initially
- App interface is functional but not the most intuitive
- Installation requires moderate electrical knowledge
- Premium pricing compared to non-Bluetooth soft start kits
Who should buy this: RV owners who boondock or rely on limited power sources, homeowners with older AC units that trip breakers on startup, and anyone who values the ability to monitor compressor health via a smartphone app.

Troubleshooting Quick Reference
| Symptom | Likely Cause | Action |
|---|---|---|
| AC trips breaker on startup | Loose wiring, failed ground, or degraded kit | Inspect all connections; check app for error codes |
| Bluetooth won’t connect | Module not powered, phone too far, app outdated | Power-cycle breaker; update app; move closer |
| Higher-than-normal inrush current | Dirty connections, compressor wear, firmware issue | Clean terminals; update firmware; monitor trend |
| Kit feels excessively hot | Blocked airflow, debris buildup | Clean module and compartment; ensure ventilation |
| Compressor short-cycles | Thermostat issue or short-cycle protection active | Wait 3–5 minutes between cycles; check thermostat wiring |
When to Replace Your Soft Start Kit
With proper maintenance, a quality soft start kit can last a decade or more. However, consider replacement if:
- Startup current readings trend upward over multiple seasons despite clean connections.
- The enclosure shows physical damage (cracks, exposed circuitry).
- The module triggers repeated over-temperature or locked-rotor faults that aren’t caused by the compressor itself.
- Firmware updates are no longer available and known bugs affect your use case.
If you’re also looking into maintaining other home or RV accessories, you might find the ozone generator accessories and safety monitoring guide useful for a similar approach to accessory upkeep.
How We Research
This guide was compiled by synthesizing manufacturer documentation from MICRO-AIR (including installation manuals, troubleshooting guides, and firmware release notes), publicly available product specifications, and verified customer and professional installer reviews. We have not personally installed, tested, or owned the MICRO-AIR EasyStart FLEX 398 or any other soft start kit. Our goal is to curate the most accurate, practical maintenance information available so you can care for your equipment with confidence. When we reference common reviewer experiences, we are paraphrasing aggregate sentiment from verified purchase reviews — not quoting specific individuals or fabricating anecdotes.


Leave a Reply