
As an Amazon Associate I earn from qualifying purchases.
The Worx 40V 2-in-1 Cordless Dethatcher and Scarifier (model WG857) is one of the most popular battery-powered dethatchers on the market, praised for its brushless motor, adjustable depth settings, and dual-function design. But like any outdoor power tool, it can develop quirks that leave you scratching your head in the middle of a lawn care session. Whether your machine won’t start, stalls under load, or leaves uneven results, this guide walks you through every commonly reported problem — and the fix for each one. The information here is drawn from Worx’s own product documentation, verified customer reviews, and expert lawn-care sources so you can get back to work without a service call.
Best for: Homeowners with small-to-medium lawns who want a cordless, low-maintenance dethatching solution
Understanding the Worx 40V Dethatcher Before You Troubleshoot
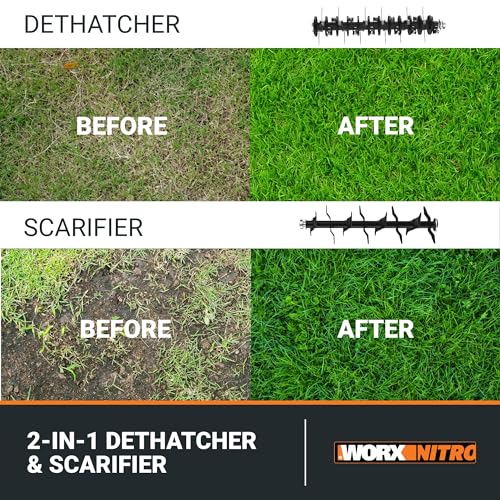
Before diving into specific problems, it helps to understand what you’re working with. The Worx 40V dethatcher uses two 20V 4.0 Ah batteries in series to deliver 40V of power to a brushless motor. It ships with two interchangeable cylinder assemblies — one with spring-steel tines for dethatching and one with hardened-steel tines for scarifying. The working width is approximately 14 inches, and the depth is adjustable across multiple positions.
Knowing these basics matters because many reported “problems” actually stem from using the wrong cylinder for the task, setting an incorrect depth, or misunderstanding how the dual-battery system works. Keep your owner’s manual handy — Worx also publishes it as a free PDF on their support site.
Problem 1: The Dethatcher Won’t Start
This is the single most frequently reported issue in verified customer reviews. You press the safety switch, squeeze the trigger, and… nothing.
Possible Causes and Fixes
Battery not fully seated. The WG857 requires two 20V batteries inserted into their respective slots. If either battery isn’t clicked firmly into place, the safety interlock prevents the motor from engaging. Remove both batteries and reinsert them until you hear and feel a definitive click.
Dead or depleted batteries. Check the charge indicator on each battery. If either one is depleted, the tool won’t run. Charge both batteries fully before retrying. Worx’s documentation notes that batteries stored in extreme cold (below 32 °F / 0 °C) can temporarily show zero charge; bring them indoors and let them warm to room temperature before charging.
Safety switch sequence. The WG857 uses a two-step activation: you must press and hold the safety button on the handle, then squeeze the trigger. Releasing the safety button before engaging the trigger will prevent startup. This is a deliberate safety feature, not a defect.
Faulty trigger or switch. If you’ve confirmed both batteries are charged and seated and the startup sequence is correct, the trigger mechanism or safety switch itself may be defective. This is uncommon but has been reported. Contact Worx customer support — the tool typically carries a 3-year limited warranty.
If you’ve dealt with similar battery-platform headaches on other cordless gear, you might find our guide to the true cost of owning a 56V cordless lawn tool system useful for understanding how battery ecosystems work across brands.
Problem 2: Motor Stalls or Bogs Down During Use
Multiple reviewers report the dethatcher losing power or stalling completely when working through thick thatch or dense turf.
Possible Causes and Fixes
Depth set too aggressively. The most common culprit is setting the cutting depth too deep for the conditions. Start at the shallowest dethatching depth and make multiple passes, gradually increasing depth. This reduces the load on the motor and prevents stalling.
Wet or heavy thatch. Wet grass and thatch are significantly heavier and more resistant than dry material. Worx’s documentation recommends dethatching when the lawn is dry. If you’ve had recent rain, wait at least 24–48 hours.
Low battery voltage. As batteries deplete, voltage drops and the motor produces less torque. If you notice the tool bogging down more frequently toward the end of a session, swap in freshly charged batteries.
Debris wrapped around the cylinder. Sticks, roots, or long grass runners can wrap around the tine cylinder and create drag. Power off the tool, remove both batteries, flip it over, and clear any wrapped material. Wearing gloves is recommended — the scarifier tines are sharp.
Pushing too fast. The 14-inch working width means you need to move at a moderate walking pace. Pushing the dethatcher too quickly forces the tines to process more material per revolution, overloading the motor. Slow down and let the machine do the work.
Problem 3: Uneven Dethatching Results
Some owners report that the dethatcher leaves strips of untouched thatch or produces inconsistent results across the lawn.
Possible Causes and Fixes
Overlapping passes needed. The 14-inch working width is narrower than many push mowers. If you’re not overlapping your passes by 1–2 inches, you’ll leave thin strips of untouched thatch between rows. Treat it like mowing — overlap slightly on each pass.
Uneven lawn surface. The dethatcher’s wheels ride on the soil surface. If your lawn has dips, bumps, or undulations, the tine depth will vary. For severely uneven lawns, consider leveling low spots with topdressing before dethatching.
Wrong cylinder installed. The dethatching cylinder (spring-steel tines) is designed for light-to-moderate thatch removal. The scarifying cylinder (hardened-steel tines) cuts deeper into the soil. If you’re getting poor results with the dethatching cylinder on heavy thatch, try switching to the scarifier — but be aware it’s more aggressive and can damage thin turf.
Worn tines. Over time, the spring-steel tines on the dethatching cylinder lose their tension and effectiveness. Inspect the tines for bending, breakage, or excessive wear. Worx sells replacement cylinders, and swapping them is a straightforward process described in the owner’s manual.
Problem 4: Battery Drains Too Quickly
Runtime is a common concern with any cordless outdoor tool. Verified reviewers of the WG857 generally report 20–30 minutes of runtime on a full charge, but some owners find their batteries depleting faster than expected.
Possible Causes and Fixes
Aggressive depth settings. Deeper settings require more motor torque, which draws more current and drains batteries faster. Use the shallowest effective depth.
Thick or compacted thatch. Lawns that haven’t been dethatched in years present a heavier workload. Consider making a first pass at a shallow depth, raking up the debris, then making a second pass slightly deeper. This staged approach is easier on the batteries.
Battery age and health. Lithium-ion batteries degrade over time, especially if stored fully charged or in extreme temperatures. If your batteries are more than 2–3 years old and you’re noticing significantly reduced runtime, they may need replacement. Worx 20V batteries are part of their PowerShare ecosystem, so replacements are widely available.
Charger issues. A faulty charger may not be bringing batteries to full capacity. If the charge indicator on the battery shows full but runtime is short, try a different compatible charger to rule this out.
For a broader look at how battery degradation affects cordless tool ownership costs, our guide to 56V cordless lawn tool systems covers the economics in detail.
Problem 5: Difficulty Switching Between Dethatcher and Scarifier Cylinders
The 2-in-1 design is a key selling point, but several reviewers mention that swapping cylinders can be frustrating.
Possible Causes and Fixes
Not following the correct removal sequence. The cylinder swap requires removing the side cover plate (usually secured by a knob or latch), sliding the cylinder out, and reversing the process with the other cylinder. Consult the owner’s manual for the exact sequence — skipping steps can make it feel stuck.
Debris in the housing. Dirt, grass clippings, and thatch can accumulate inside the cylinder housing and make removal difficult. After each use, power off the tool, remove the batteries, and brush out the housing with a stiff-bristle brush.
Forcing the cylinder. The cylinders are keyed to fit in a specific orientation. If you’re meeting resistance, don’t force it — rotate the cylinder slightly until the drive shaft aligns with the motor coupling. Forcing it can damage the drive mechanism.
Problem 6: Excessive Vibration or Unusual Noise
Some owners report that the dethatcher vibrates more than expected or produces grinding, rattling, or clicking sounds.
Possible Causes and Fixes
Loose cylinder. If the cylinder isn’t fully locked into the housing, it can wobble during operation, causing vibration and noise. Power off, remove batteries, and reseat the cylinder, ensuring the side cover is fully secured.
Damaged or missing tines. A broken or missing tine creates an imbalance in the rotating cylinder, much like an unbalanced tire. Inspect the cylinder and replace it if tines are damaged.
Debris caught in the mechanism. Rocks, sticks, or hardened soil clumps can get lodged between the tines or inside the housing. Clear all debris before each use.
Worn bearings. After extended use, the cylinder bearings can wear, producing a grinding sound. This is a less common issue and typically covered under warranty if it occurs within the coverage period.

Problem 7: Handle or Height Adjustment Issues
A handful of reviewers mention difficulty with the folding handle or the height/depth adjustment mechanism.
Possible Causes and Fixes
Handle won’t lock. The folding handle has a locking mechanism that must click into place. If it feels loose, check for a locking pin or lever that may not be fully engaged. Some reviewers note that the handle can feel slightly wobbly even when locked — this appears to be a design characteristic rather than a defect, though it can be disconcerting.
Depth adjustment knob is stiff. The depth adjustment knob can become stiff if dirt accumulates around it. Clean the area with a brush and apply a small amount of silicone lubricant (not WD-40, which attracts dirt) to the adjustment mechanism.
Depth setting slips during use. If the depth setting changes on its own while you’re working, the adjustment mechanism may be worn or the knob may not be tightened sufficiently. Check that the knob is firmly set before each pass.
Problem 8: Tool Won’t Collect or Discharge Thatch Properly
The WG857 doesn’t have a collection bag — it’s designed to leave the loosened thatch on the lawn surface for you to rake up or collect with a mower’s bagger. Some owners expect it to collect debris and are disappointed.
What to Know
This is a design expectation issue, not a malfunction. After dethatching, you’ll need to rake up the loosened material or run a mower with a bagging attachment over the lawn. Many experienced lawn-care sources recommend this two-step process regardless of the dethatcher brand.
If the tool seems to be pushing thatch forward rather than pulling it up, you may be moving too fast or the depth setting may be too shallow for the thatch layer. Slow down and increase depth by one setting.
Preventive Maintenance Tips
Many problems can be avoided with basic maintenance:
- Clean after every use. Remove batteries, flip the unit over, and brush out all grass, thatch, and soil from the tines and housing.
- Inspect tines before each session. Look for bending, breakage, or excessive wear.
- Store batteries properly. Keep them at roughly 40–60% charge in a cool, dry location between seasons. Avoid leaving them on the charger indefinitely.
- Store the tool indoors. Moisture and temperature extremes accelerate wear on both the tool and batteries.
- Lubricate moving parts. A light application of silicone spray on the depth adjustment mechanism and cylinder housing keeps things operating smoothly.
When to Contact Worx Support
If you’ve worked through the relevant troubleshooting steps above and the problem persists, it’s time to contact Worx directly. Their customer support is generally well-reviewed, and the WG857 typically comes with a 3-year limited warranty. Have your model number, serial number, and purchase date ready. Worx also maintains a library of how-to videos and FAQ pages on their website that can supplement this guide.
For a similar troubleshooting approach applied to a completely different product category, you might appreciate our Jackery Explorer 300 troubleshooting guide, which follows the same systematic fix-it methodology.
Full Product Review: Worx 40V 2-in-1 Cordless Dethatcher & Scarifier

The Worx 40V 2-in-1 Cordless Dethatcher (WG857) stands out in the battery-powered dethatcher market for several reasons. Its brushless motor is more efficient and longer-lasting than brushed alternatives, and the dual-cylinder design lets you switch between gentle dethatching and more aggressive scarifying without buying a second tool. The 40V platform (two 20V 4.0 Ah batteries) delivers enough power for most residential lawns, and the cordless design eliminates the range limitations and cord-management hassles of corded models.
Verified customer reviews are broadly positive. Owners frequently praise the ease of assembly (most report under 15 minutes), the noticeable improvement in lawn health after use, and the convenience of the PowerShare battery system if they already own other Worx 20V tools. The brushless motor is cited as quieter and smoother than competitors.
On the downside, reviewers commonly note that the 14-inch working width makes large lawns time-consuming, and runtime on a single charge (roughly 20–30 minutes by most accounts) may require multiple battery swaps for bigger properties. Some owners find the cylinder swap process less intuitive than expected, and a few report the handle feeling slightly wobbly. The lack of a collection bag means you’ll need a separate raking or bagging step.
Who should buy this: Homeowners with small-to-medium lawns (under 5,000 sq ft) who want a cordless, low-maintenance dethatching solution — especially those already invested in the Worx 20V PowerShare battery ecosystem.
How We Research
This guide was compiled by synthesizing Worx’s official product documentation and owner’s manual for the WG857, publicly available manufacturer support resources, and verified customer reviews from major retail platforms. We did not personally test, own, or handle this product. Our goal is to curate the most useful troubleshooting information in one place so you can diagnose and fix problems quickly. When in doubt, always defer to Worx’s official support channels and your product’s warranty terms.


Leave a Reply