
As an Amazon Associate I earn from qualifying purchases.
So you just picked up the TP-Link Archer AX55 — a dual-band AX3000 Wi-Fi 6 router that promises faster speeds, better range, and improved multi-device handling compared to older Wi-Fi 5 hardware. Whether you’re replacing an aging router or setting up a home network for the first time, this guide walks you through every step from opening the box to browsing the web on a fully configured, secured network. Everything here is based on TP-Link’s official documentation, the Tether app workflow, and common guidance from verified users who have gone through the process themselves.
Best for: First-time router buyers, households upgrading from Wi-Fi 5, and anyone who wants a straightforward app-guided setup
What’s in the Box
Before you start plugging things in, lay everything out on a table so you can confirm nothing is missing. According to TP-Link’s documentation, the Archer AX55 box should contain:
- The Archer AX55 router unit with four external antennas (pre-attached or requiring a simple snap-on, depending on the revision)
- One power adapter (12V / 1.5A)
- One RJ45 Ethernet cable (Cat 5e, roughly 1 meter / 3 feet)
- A quick installation guide (printed card with QR code)
If any item is missing or visibly damaged, contact TP-Link support or the retailer before proceeding. The quick installation guide includes a QR code that links directly to the Tether app download — keep it handy.
Step 1: Position the Router
Placement matters more than most people realize. TP-Link’s own guidance and networking experts consistently recommend:
- Central location — place the router as close to the center of your living space as possible to maximize coverage in every direction.
- Elevated surface — a shelf, desk, or wall-mount position roughly 3–5 feet off the ground is ideal. Avoid placing it on the floor.
- Away from interference — keep the router at least a few feet from microwaves, baby monitors, cordless phones, Bluetooth speakers, and large metal objects (filing cabinets, refrigerators).
- Open air — don’t stuff it inside a closed cabinet or behind a TV. The antennas need unobstructed space to broadcast effectively.
- Antennas upright — position all four antennas vertically for the best horizontal coverage pattern. If you have a multi-story home, angling one or two antennas at 45 degrees can help push signal to other floors.
If your modem is in a corner of the house and you can’t move it, you may eventually want to look into a mesh system like the TP-Link Deco BE25 to extend coverage. But for now, get the Archer AX55 as centrally located as your Ethernet drop allows.
Step 2: Connect the Hardware
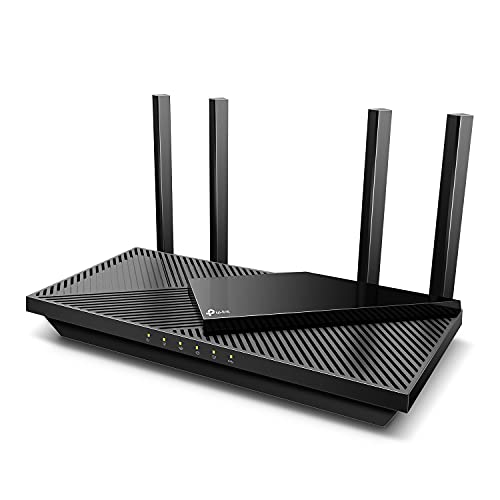
This is the physical wiring step. It takes about two minutes:
1. Power off your modem. Unplug its power cable from the wall. If your modem has a battery backup, remove or disconnect that as well. Wait 30 seconds — this clears the modem’s connection cache and helps it recognize the new router. 2. Connect modem to router. Take the included Ethernet cable (or your own, if you prefer a longer run) and plug one end into your modem’s LAN/Ethernet port. Plug the other end into the WAN port on the back of the Archer AX55. The WAN port is typically colored differently (blue) and labeled “WAN” or “Internet.” 3. Power on the modem. Plug the modem back in and wait 1–2 minutes for it to fully boot and establish a connection with your ISP. You’ll know it’s ready when the modem’s “Online” or “Internet” LED is solid. 4. Power on the router. Connect the included power adapter to the Archer AX55’s DC port, then plug it into a wall outlet. Press the power button on the back of the router if it doesn’t turn on automatically. Wait about 60 seconds for the router to boot — the Wi-Fi LED on the front panel should turn solid green or white.
Important: If you were previously using a different router, disconnect it entirely. Having two routers broadcasting on the same network without proper configuration causes conflicts.
Step 3: Download the TP-Link Tether App
TP-Link designed the Archer AX55 to be set up primarily through their Tether mobile app, and based on verified user feedback, the app-based process is significantly smoother than the browser-based alternative for most beginners.
1. On your smartphone or tablet, open the App Store (iOS) or Google Play Store (Android). 2. Search for “TP-Link Tether” and download the official app (look for the TP-Link logo — the publisher should be “TP-Link Corporation Limited”). 3. Create a TP-Link ID if you don’t already have one. This is a free account that lets you manage your router remotely and receive firmware update notifications. You’ll need a valid email address.
The Tether app is also used for ongoing management — things like checking connected devices, running speed tests, updating firmware, and adjusting parental controls. It’s worth keeping on your phone.
Step 4: Connect to the Router’s Default Network
Before you can configure the router through the app, your phone needs to be connected to the router’s Wi-Fi:
1. Open your phone’s Wi-Fi settings. 2. Look for the default network name (SSID). It will be something like `TP-Link_XXXX` or `TP-Link_XXXX_5G`. The exact name and default password are printed on the label on the bottom of the router. 3. Connect to the 2.4 GHz or 5 GHz network using the default password from the label. Either band works for setup.

If you don’t see the network, make sure the router has fully booted (wait another minute) and that the Wi-Fi LED is solid. Some users report needing to toggle their phone’s Wi-Fi off and on to trigger a fresh scan.
Step 5: Run the Tether App Setup Wizard
Now for the main event. Open the Tether app and follow these steps:
1. The app should automatically detect your Archer AX55. Tap on it to begin setup. If it doesn’t appear, make sure your phone is connected to the router’s default Wi-Fi network (not your old network or mobile data). 2. Create a local router password. This is the admin password for accessing router settings — it’s separate from your Wi-Fi password. Choose something strong and write it down. You’ll need it if you ever want to change settings through the web interface. 3. Select your connection type. The app will attempt to auto-detect your ISP’s connection type. For most home broadband connections (cable, fiber), it will detect Dynamic IP automatically. If you have DSL or a connection that requires PPPoE credentials, you’ll need the username and password from your ISP. If you’re unsure, call your ISP — they can tell you. 4. Set your Wi-Fi network name (SSID) and password. This is where you personalize your network. A few tips:
- Choose a name you’ll recognize but that doesn’t reveal personal information (avoid “Smith Family” or your apartment number).
- Use a strong password — at least 12 characters mixing letters, numbers, and symbols.
- The Archer AX55 supports Smart Connect, which merges the 2.4 GHz and 5 GHz bands under a single SSID. The router automatically steers devices to the optimal band. Most users find this convenient, but if you prefer separate SSIDs for each band, you can disable Smart Connect later in settings.
5. Review and apply. The app will show a summary of your settings. Confirm everything looks right and tap Apply. The router will reboot — this takes about 30–60 seconds. 6. Reconnect to your new network. After the reboot, your phone will disconnect because the old default SSID no longer exists. Go to your phone’s Wi-Fi settings and connect to the new network name you just created, using your new password.
Step 6: Verify Your Internet Connection
Once reconnected, open a web browser on your phone and try loading a website. If the page loads, congratulations — your basic setup is complete.
If it doesn’t work:
- Reboot the modem and router in sequence (modem first, wait two minutes, then router).
- Check the WAN port connection — make sure the Ethernet cable is firmly seated in both the modem and the router’s blue WAN port.
- Verify your connection type — re-open the Tether app, go to Tools > Internet Connection, and confirm the settings match what your ISP requires.
- Contact your ISP — some providers require you to register your router’s MAC address or release the old router’s DHCP lease. A quick call usually resolves this.
Step 7: Essential First-Use Configuration
Your router is online, but there are several settings worth configuring right away for security and performance. All of these are accessible through the Tether app or the web interface (type `192.168.0.1` or `tplinkwifi.net` into a browser while connected to the router).
Update the Firmware
This is the single most important post-setup step. TP-Link regularly releases firmware updates that patch security vulnerabilities and improve performance.
1. In the Tether app, go to Tools > System > Firmware Update. 2. If an update is available, tap Update and wait for the process to complete. Do not unplug the router during a firmware update — this can brick the device. 3. The router will reboot after the update.
Enable WPA3 (If Your Devices Support It)
The Archer AX55 supports WPA3, the latest Wi-Fi security protocol. By default, it may be set to WPA2/WPA3 mixed mode, which is a good compromise — it lets older WPA2-only devices connect while giving WPA3-capable devices stronger encryption. You can check this under Wi-Fi Settings > Security in the Tether app or web interface.
If all your devices are relatively recent (manufactured after 2020), you can set it to WPA3-only for maximum security. If you have older smart home devices, stick with the mixed mode.
Set Up a Guest Network
A guest network gives visitors internet access without exposing your main network and its connected devices. In the Tether app:
1. Go to Tools > Guest Network. 2. Toggle it on for 2.4 GHz, 5 GHz, or both. 3. Set a separate SSID and password.
This is also useful for IoT devices (smart plugs, cameras) that you want to isolate from your primary devices for security reasons.
Configure Parental Controls (Optional)
TP-Link’s HomeShield service (basic tier is free) lets you set content filters, time limits, and bedtime schedules for specific devices. This is accessible through the Tether app under the HomeShield tab. The premium tier adds more granular controls, but the free version covers the basics.
Enable TP-Link’s EasyMesh (Optional)
If your home is large or has Wi-Fi dead zones, the Archer AX55 supports EasyMesh, an industry standard that lets you add compatible mesh nodes later without replacing your router. This is a future-proofing feature — you don’t need to configure it now unless you’re adding nodes immediately.
Step 8: Connect Your Devices
Now it’s time to get everything online. On each device (laptops, phones, tablets, smart TVs, game consoles, smart home gadgets):
1. Open Wi-Fi settings. 2. Select your new network name. 3. Enter your new password.
Pro tip from verified users: Connect your most important devices first and test them before moving on to IoT gadgets. Smart home devices sometimes have quirks with Wi-Fi 6 routers — some older smart plugs and cameras only support 2.4 GHz. If Smart Connect is enabled and a device won’t connect, try temporarily disabling Smart Connect, connecting the device to the 2.4 GHz band specifically, then re-enabling Smart Connect.
If you’re setting up other new devices alongside your router, you might find our setup guide format helpful for other products too — the step-by-step approach works for everything from treadmills to earbuds.
Detailed Product Review: TP-Link Archer AX55

The TP-Link Archer AX55 is a dual-band AX3000 Wi-Fi 6 router that delivers up to 2402 Mbps on the 5 GHz band and 574 Mbps on the 2.4 GHz band (theoretical maximums under ideal conditions — real-world speeds will be lower). It features a 1 GHz dual-core processor, four Gigabit LAN ports, one Gigabit WAN port, and one USB 3.0 port for file sharing. OFDMA and MU-MIMO technology allow it to handle multiple devices simultaneously with less latency, which is a genuine advantage of Wi-Fi 6 over older standards.
What verified reviewers commonly praise: The setup process through the Tether app is frequently described as quick and painless — many users report being online within 10 minutes. Range is a common highlight, with users in medium-sized homes (1,500–2,500 sq ft) reporting solid coverage throughout. The USB 3.0 port for network-attached storage is a nice bonus at this price tier. EasyMesh compatibility is appreciated by users who want to expand coverage later without committing to a proprietary mesh ecosystem.
What verified reviewers commonly criticize: Some users report that the HomeShield premium features feel like an upsell for capabilities that should be free. A few users have experienced occasional disconnections that were resolved by firmware updates — reinforcing why updating firmware immediately is critical. The router’s design is functional but not particularly compact; the four antennas make it visually prominent. QoS (Quality of Service) settings are somewhat limited compared to higher-end models.
Who should buy this: The Archer AX55 is an excellent choice for beginners and mainstream households that want a reliable Wi-Fi 6 upgrade without a steep learning curve. It’s well-suited for homes with 20–40 connected devices, moderate to heavy streaming, and standard online gaming. Power users who want advanced features like VPN server support, detailed traffic analysis, or tri-band capability should look at higher-tier models.
Troubleshooting Common Issues
Based on TP-Link’s support documentation and recurring themes in verified user feedback, here are the most common post-setup issues and their fixes:
| Problem | Likely Cause | Fix |
|---|---|---|
| No internet after setup | ISP hasn’t released old router’s lease | Reboot modem for 2 minutes; call ISP if it persists |
| Devices won’t connect | Wrong password or WPA3 incompatibility | Double-check password; switch to WPA2/WPA3 mixed mode |
| Slow speeds | Connected to 2.4 GHz band | Enable Smart Connect or manually connect to 5 GHz |
| Intermittent drops | Outdated firmware | Update firmware via Tether app |
| Can’t access web interface | Wrong IP address | Try both `192.168.0.1` and `tplinkwifi.net` |
| Smart home device won’t connect | Device only supports 2.4 GHz | Temporarily disable Smart Connect, connect on 2.4 GHz |
If you’re still experiencing issues after trying these fixes, TP-Link’s support site has a live chat option and a community forum where other users share solutions. You can also do a factory reset by holding the Reset button on the back of the router for about 10 seconds — but this erases all your settings, so it’s a last resort.
Quick-Reference Setup Checklist
For those who want the condensed version:
- [ ] Unbox and verify all contents
- [ ] Position router centrally, elevated, antennas vertical
- [ ] Power off modem, connect modem to router’s WAN port
- [ ] Power on modem, wait 2 minutes, power on router
- [ ] Download TP-Link Tether app
- [ ] Connect phone to router’s default Wi-Fi (check bottom label)
- [ ] Run Tether setup wizard — set connection type, SSID, password
- [ ] Verify internet works
- [ ] Update firmware immediately
- [ ] Enable WPA3 or WPA2/WPA3 mixed mode
- [ ] Set up guest network
- [ ] Connect all household devices
Understanding Wi-Fi 6: What You’re Actually Getting
If you’re upgrading from a Wi-Fi 5 (802.11ac) router, here’s what Wi-Fi 6 (802.11ax) actually improves in practice:
- OFDMA (Orthogonal Frequency Division Multiple Access): Lets the router communicate with multiple devices in a single transmission, reducing wait times when many devices are active simultaneously.
- MU-MIMO (Multi-User, Multiple Input, Multiple Output): The Archer AX55 supports 4×4 MU-MIMO, meaning it can send data to up to four devices at once rather than one at a time.
- BSS Coloring: Reduces interference from neighboring networks — particularly useful in apartments and dense housing.
- Target Wake Time (TWT): Lets battery-powered devices (phones, tablets, IoT sensors) negotiate when they wake up to send/receive data, improving their battery life.
To benefit from these features, your devices also need to support Wi-Fi 6. Most smartphones, laptops, and tablets released since 2020 do. Older devices will still connect and work fine — they just won’t get the Wi-Fi 6 performance improvements. If you’re curious about even newer networking standards, our overview of the TP-Link Deco BE25 covers what Wi-Fi 7 brings to the table.
How We Research
This guide was compiled by synthesizing TP-Link’s official product documentation, the Archer AX55 quick installation guide, the Tether app’s setup workflow, and verified customer reviews from major retail platforms. We also referenced networking best-practice guidance from independent tech publications. We have not personally tested or owned this router — our goal is to curate the most accurate, helpful information from reliable public sources so you can set up your router with confidence. If manufacturer documentation and user reports conflict, we note both perspectives.


Leave a Reply