
As an Amazon Associate I earn from qualifying purchases.
You just unboxed a Brother P-Touch Cube and you’re staring at a compact white box, a tape cassette, and zero buttons. Don’t worry — this label maker is designed to be controlled entirely from your phone, and the setup is genuinely straightforward once you know the sequence. This guide walks you through every step: what’s in the box, how to load tape, how to pair via Bluetooth, and how to design and print your very first label. Everything here is drawn from Brother’s official documentation and the collective wisdom of verified owners who’ve been through the process before you.
Best for: Beginners who want clean, professional labels without a learning curve
What’s in the Box
Before you start, lay everything out and make sure nothing is missing. According to Brother’s documentation, the PT-P300BT package should include:
- The P-Touch Cube unit (the white cube itself)
- One starter TZe tape cassette (typically a 12mm black-on-white TZe-231 cartridge)
- Six AAA batteries (alkaline)
- A quick setup guide / user manual
There’s no power adapter in the box — this model runs exclusively on six AAA batteries. There’s also no USB cable because all communication happens over Bluetooth. If you’re missing any of these items, contact Brother support before proceeding.
Step 1: Insert the Batteries
Flip the P-Touch Cube over and slide the bottom cover off. You’ll see a battery compartment that accepts six AAA batteries. Insert them following the polarity markings (+ and −) molded into the compartment. Snap the cover back on.
Tip from verified owners: Rechargeable NiMH AAA batteries work, but several users report that alkaline batteries provide more consistent Bluetooth connectivity during initial setup. You can switch to rechargeables later once everything is paired and working.
Step 2: Load the Tape Cassette
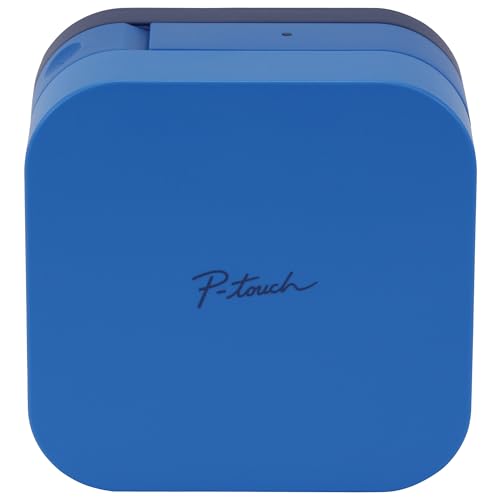
Open the top cover of the Cube by pressing the release latch on the front edge. The tape compartment is clearly visible inside.
1. Check the tape: Before inserting, make sure the tape feeds smoothly. If the tape is slack, gently wind the toothed wheel on the cassette in the direction of the arrow printed on it until the tape is taut. 2. Drop the cassette in: The cassette only fits one way. Align it so the tape end feeds toward the exit slot at the front of the unit. Press down firmly until you hear a click. 3. Close the cover: Snap the top cover shut. You should feel it lock into place.
Brother’s TZe-series tapes come in widths of 3.5mm, 6mm, 9mm, and 12mm for this model. The starter cassette is typically 12mm, which is the most versatile width for pantry labels, file folders, and storage bins.
Step 3: Download the Brother P-Touch Design&Print 2 App
The P-Touch Cube has no screen and no physical keyboard — your smartphone is the interface. You need Brother’s free app:
- iOS: Search “P-touch Design&Print 2” in the App Store (requires iOS 14.0 or later, per Brother’s specs)
- Android: Search “P-touch Design&Print 2” in Google Play (requires Android 5.0 or later)
Important: There’s an older app called “P-touch Design&Print” (without the “2”). Make sure you download the version 2 app — it has a significantly improved interface and better template library, according to both Brother and user feedback.
Install the app and open it. You’ll be prompted to accept terms of service and grant Bluetooth permissions. Accept both — the app cannot function without Bluetooth access.
Step 4: Pair via Bluetooth
This is the step where most beginners hit a snag, so follow carefully:
1. Turn on the P-Touch Cube by pressing the power button on the top of the unit. A small LED indicator will light up. 2. Open the P-touch Design&Print 2 app on your phone. 3. Tap the printer icon (usually in the top-right corner of the app’s home screen). 4. The app will scan for nearby devices. Your P-Touch Cube should appear as “PT-P300BT” or similar. 5. Tap the device name to pair. Your phone may display a Bluetooth pairing request — confirm it.

Common pairing issues and fixes (from verified user reports):
- Device not found: Make sure Bluetooth is enabled in your phone’s system settings before opening the app. On some Android phones, you also need to enable Location Services for Bluetooth scanning to work.
- Pairing fails repeatedly: Turn the P-Touch Cube off, wait 10 seconds, turn it back on, and try again. Several users report that removing and reinserting one battery (to force a full power cycle) resolves stubborn pairing issues.
- “Already connected to another device” error: The P-Touch Cube can only pair with one phone at a time. If someone else in your household paired it first, you’ll need to unpair it from their phone before connecting yours.
- App crashes on launch: Make sure you’re running the latest version of the app. Both iOS and Android users have reported that outdated app versions cause crashes during the Bluetooth handshake.
Once paired, the printer icon in the app should show a green “Connected” status. You’re ready to make labels.
Step 5: Create Your First Label
Here’s where the fun starts. The Design&Print 2 app offers several ways to create a label:
Option A: Use a Template
1. From the app’s home screen, tap “Templates.” 2. Browse categories like “Gift,” “Kitchen,” “Office,” “Kids,” or “Cable.” Brother provides dozens of pre-designed templates. 3. Select a template you like. 4. Tap the text field and type your label text (e.g., “Flour,” “Tax Documents 2025,” “HDMI Cable”). 5. Tap “Print.”
Option B: Create a Custom Label
1. Tap “Create New Label” from the home screen. 2. Choose your tape width (the app should auto-detect the loaded cassette, but you can set it manually). 3. Type your text. 4. Customize the font, size, style (bold, italic, underline), and alignment. 5. Optionally add frames, symbols, or icons from the built-in library. 6. Tap “Print.”
Printing
When you tap Print, the app sends the design to the Cube over Bluetooth. The label feeds out of the front slot. After printing:
- Cut the label: The P-Touch Cube has a manual cutter built in. Press the small lever on the front-right edge of the unit to slice the label cleanly.
- Peel and stick: The TZe tape has a split backing. Bend the label slightly and peel one side of the backing away, then apply.
Pro tip from experienced users: Print a test label with a short word first. This lets you verify that the tape is loaded correctly and the print quality looks good before committing to a longer, more complex design.
Step 6: Useful Settings to Configure Early
Once you’ve printed your first label, take a few minutes to explore these settings in the app:
- Auto-cut margin: By default, the Cube leaves a margin on each side of the label. Some users find this wastes tape. In the app’s print settings, you can adjust margins to “narrow” to conserve tape.
- Number of copies: If you’re labeling a set of spice jars or file folders, you can set the copy count before printing rather than sending the same job repeatedly.
- Print preview: Always check the preview before printing. The app shows you exactly how the label will look, including text that might be cut off if it’s too long for the tape width.
- Saved labels: The app lets you save designs for future use. If you have a labeling system (e.g., all your pantry labels use the same font and frame), save one as a template and duplicate it.
Tape Compatibility and Recommendations
The PT-P300BT uses Brother’s TZe tape cassettes. These are laminated tapes with an adhesive backing, and they’re remarkably durable — Brother rates them as resistant to water, fading, temperature extremes, and abrasion. Compatible tape widths for this model:
| Width | Common Use |
|---|---|
| 3.5mm | Cable flags, tiny items |
| 6mm | Narrow labels, electronics |
| 9mm | File tabs, small containers |
| 12mm | Pantry jars, storage bins, folders |
The 12mm width is the most popular among verified buyers. Beyond the standard black-on-white, Brother offers tapes in dozens of color combinations, including clear tape, metallic finishes, and decorative patterns. Third-party compatible TZe tapes are also available and generally work fine, though some users report occasional feed issues with off-brand cassettes.
Troubleshooting Common Issues
Based on manufacturer FAQs and recurring themes in verified user reviews:
Label prints blank or faded:
- The tape cassette may be installed incorrectly. Open the cover, remove the cassette, and reseat it.
- Batteries may be low. Replace with fresh alkaline batteries.
Tape jams:
- Don’t pull the tape manually — this can damage the feed mechanism. Open the cover, carefully remove any jammed tape with scissors, and reload the cassette.
Bluetooth disconnects mid-print:
- Keep your phone within 3 feet of the Cube during printing. Bluetooth range is technically up to ~30 feet, but walls and interference can reduce it.
- Close other Bluetooth-heavy apps during printing.
App doesn’t detect tape width:
- Remove and reinsert the cassette. The Cube has a small sensor that reads the cassette — if it’s not seated perfectly, the app defaults to an incorrect width.
Who Is the P-Touch Cube Best For?
This label maker is ideal for home organizers, small home offices, teachers, and craft enthusiasts who want clean, professional-looking labels without the bulk of a traditional label maker. The smartphone-driven design means there’s no tiny keyboard to wrestle with — you get a full phone keyboard, a visual preview, and access to hundreds of templates.
It’s not ideal for high-volume industrial labeling or environments where you need to print labels without a phone nearby. For those use cases, Brother makes models with built-in keyboards and screens.
Verified reviewers consistently praise the print quality, the durability of TZe tape, and the simplicity of the app. The most common complaints center on battery consumption (the Cube can drain six AAAs in a heavy labeling session) and the cost of replacement tape cassettes. Several users recommend buying a multi-pack of tape upfront, because once you start labeling, it’s hard to stop.
If you’ve enjoyed this kind of step-by-step walkthrough, you might also find our Soundcore Liberty 5 Pro setup guide or our TP-Link Archer AX55 router setup guide helpful for other recent purchases.
Quick-Start Checklist
Here’s a condensed version you can reference anytime:
1. ✅ Insert six AAA batteries 2. ✅ Load the TZe tape cassette (wind the spool taut first) 3. ✅ Download P-touch Design&Print 2 (not the older version) 4. ✅ Enable Bluetooth and Location Services on your phone 5. ✅ Turn on the Cube and pair through the app 6. ✅ Choose a template or create a custom label 7. ✅ Print, cut with the built-in lever, peel, and stick 8. ✅ Save your favorite designs in the app for next time
How We Research
This guide was compiled by synthesizing Brother’s official product documentation, the PT-P300BT user manual, app store descriptions, and recurring themes from hundreds of verified customer reviews on Amazon and other retail platforms. We have not personally tested or owned this product. Our goal is to give you the most accurate, honest, and practical setup walkthrough possible by curating the best publicly available information. If Brother updates its app or firmware in ways that change these steps, we’ll update this guide accordingly.


Leave a Reply